Lazy Loading Blurry React Images
 Back
BackAuthor: Theran Brigowatz
Overview
A good UX allows users to see some UI elements even as we load data from our API. Sometimes with large network payloads this time can be significant. By allowing for UI elements to show and a good UX, users won't be as frustrated, as they would with a white page. This is perceived loading time can be a big difference maker.
While working on a project that needed huge high-resolution 3D images this image loading technique became a life saver. It allows you to load a tiny version of the image, while you wait for the high-resolution one to load. It displays a blurry image in place of the large one, and focuses in once it has loaded.
This is done for images on Medium and allows users to see instantly loaded images and increases load speed.

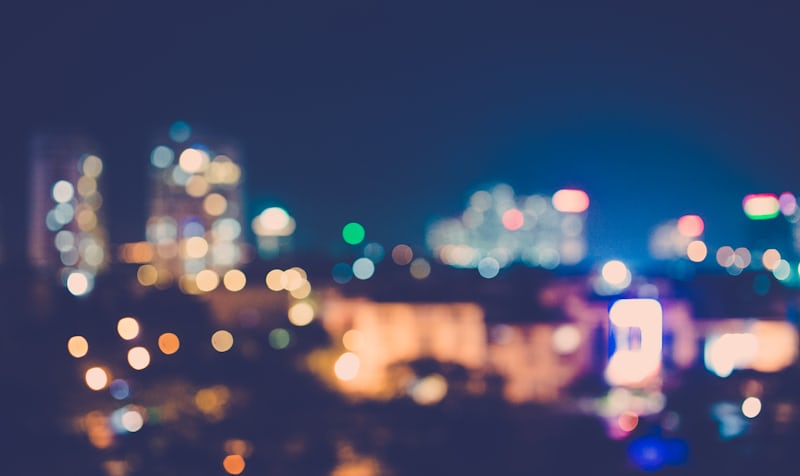
The blurry version vs. the crisp one.
Notes on Images
One thing that developers often overlook is their image size, even though they are one of the heaviest parts of your network payload. For the full size images I strive to never go beyond 150k on any image if possible. 1,280px wide should be your upper limit for the majority of screen sizes and most use cases. If you are working with ultra high-definition images you will have to adjust accordingly.
This image takes in an ultra small image on first load and they transitions to the larger full size image. When doing this I would strive to keep an image to about 30px high and size of around 500b (Yes that is bytes). I would also turn down the quality to about 10% in the JPG compressor. You want just a rough outline of colors and shapes. Below you can see what the tiny image looks like under heavy compression.
There are services like Cloudinary that allow you to work with the full-size image and then pass in transformations as query parameters in the URL for the small size images. This means you only have to load one image up to your provider. However, be wary that they do have a limit on the amount of transformations you can make before you do get charged.

A blown up version of the small image after compression. This is 500b
The Code
To start out we are going to create a basic react component. It will take in the following props:
preview: the small version of your photoimage: the full-size version of the photoalt: remember to keep it accessible
The following are optional but make it more reusable. imageStyleClass and divStyleClass allow you to inject the style classes, like from Tailwind.css or other stylesheets, for each individual image, like if you are working with different sizes. The bgColor is to be sure that something is taking up the space of the photo if your network payload is taking a long time. I have set the default to transparent.
imageStyleClass: classNames for the imagedivStyleClass: classNames for the container divbgColor: To be sure that something is there on first load
We are staring with a div and an image. We are also going to add a loading state that is set to true and a current image state. The currentImage will initially take in the preview. But as the full-sized image is loaded we will change the state. The image source will be set to the currentImage as we will update this as the image loads.
The div is there to make sure that the filter blur that escapes the image area is hidden. useEffect will be used later, while the style class props are added to their respective tags.
import React, { useEffect, useState } from 'react';
const [currentImage, setCurrentImage] = useState(preview);
const [loading, setLoading] = useState(true);

const BlurryLoadingImage = ({
  preview,
  image,
  alt,
  imageStyleClass,
  divStyleClass,
  bgColor = 'transparent',
}) => {
  return (
    <div className={divStyleClass}>
      <img src={currentImage} alt={alt} className={imageStyleClass} />
    </div>
  );
};

export default BlurryLoadingImage;
Now for where the magic happens. In your fetchImage you will wait for the large image file to load. When it is done, you will set the currentImage to the new image source. fetchImage will use the full size image source as the argument when it is called in useEffect.
const fetchImage = (src) => {
  const loadingImage = new Image();
  loadingImage.src = src;
  loadingImage.onload = () => {
    setCurrentImage(loadingImage.src);
    setLoading(false);
  };
};

useEffect(() => {
  fetchImage(image);
}, []);
Now as things stand you will go from a very tiny image to a full size one since there is no styling. We have to add the following to the image to make sure that it is going from blurry to the high resolution version. This will blur the initial image and then transition it once the image is done loading. You can adjust these timing and blur values for what looks good for your needs.
The transition between the two will make for a cool effect where the photo gets sharper like it is coming into focus. You can again adjust this time for what works for your project.
<img
  style={{
    filter: `${loading ? 'blur(20px)' : ''}`,
    transition: '1s filter linear',
    width: '100%',
    background: bgColor,
  }}
  src={currentImage}
  alt={alt}
  className={imageStyleClass}
/>
Width is set to 100% in order to fill the parent container and make sure the small image is taking up the same amount of space as the parent. Be sure to have a width set on the parent div in the divStyleClass so that you keep a uniform image size between the small and large versions. The last thing that I would recommend is setting the divClassStyle CSS to have overflow: hidden as this will make sure that the blurred pixels of the image are not shown as they will bleed over.
That is it. Now you can use this image anywhere you would use an image. It is highly reusable and allows for you to decrease loading time. Your initial images coming in at 500b vs 150k will do loads to make your UX that much better.
Final React Component
import React, { useEffect, useState } from 'react';

const BlurryLoadingImage = ({
  preview,
  image,
  alt,
  imageStyleClass,
  divStyleClass,
  bgColor = 'transparent',
}) => {
  const [currentImage, setCurrentImage] = useState(preview);
  const [loading, setLoading] = useState(true);

  const fetchImage = (src) => {
    const loadingImage = new Image();
    loadingImage.src = src;
    loadingImage.onload = () => {
      setCurrentImage(loadingImage.src);
      setLoading(false);
    };
  };

  useEffect(() => {
    fetchImage(image);
  }, []);

  return (
    <div className={divStyleClass} style={{ overflow: 'hidden' }}>
      <img
        style={{
          filter: `${loading ? 'blur(20px)' : ''}`,
          transition: '1s filter linear',
          width: '100%',
          background: bgColor,
        }}
        src={currentImage}
        alt={alt}
        className={imageStyleClass}
      />
    </div>
  );
};

export default BlurryLoadingImage;
Check out more of my articles, projects, and other content at theran.dev or on twitter.
Back